Quickstart
In this quickstart you install Falak on one host, connect a second machine as an app server, and deploy an app from a GitHub repository. At the end your app is live at an HTTPS URL like https://shop.203-0-113-20.sslip.io, with no DNS setup for the app.
Before you begin
Section titled “Before you begin”You need two Linux machines with public IPv4 addresses and root access:
| Machine | Purpose | Minimum | OS |
|---|---|---|---|
| Control plane host | Runs Falak itself (UI, API, builder) | 2 GB RAM (4 GB recommended), 10 GB free disk, ports 80 and 443 free | Ubuntu 22.04/24.04 or Debian 12, amd64 or arm64 |
| App server | Runs your app | 1 GB RAM (2 GB+ recommended) | Fresh Ubuntu 24.04 LTS, amd64 or arm64 |
You also need:
- A domain you control, for example
example.com. The control plane lives atfalak.example.com. - A GitHub account with a repository to deploy. Any Laravel, Node.js, Bun, Deno or static-site repository works. See Requirements for details.
1. Point DNS at the control plane host
Section titled “1. Point DNS at the control plane host”Create two DNS records for the control plane host’s public IP (replace 203.0.113.10):
| Name | Type | Value |
|---|---|---|
falak.example.com |
A | 203.0.113.10 |
agents.falak.example.com |
A | 203.0.113.10 |
The first is the panel. The second is the API your servers’ agents talk to over mutual TLS.
Check that they resolve before you continue:
dig +short falak.example.com agents.falak.example.com203.0.113.10203.0.113.102. Install the control plane
Section titled “2. Install the control plane”SSH into the control plane host and run the installer. Use your own domain and e-mail address. The e-mail is used for Let’s Encrypt and becomes the first admin login.
curl -fsSL https://falak.sh/install.sh \ | sudo bash -s -- --domain falak.example.com --email you@example.comThe installer checks the host, installs Docker if needed, generates /opt/falak/.env, pulls the release images, starts the stack and creates your admin account. It ends with a summary like this:
Falak v0.2.6 is running.
  Panel        https://falak.example.com  Agent API    https://agents.falak.example.com/agent/v1  (mTLS, Fleet CA)
  Admin login  you@example.com  Password     2kP7…  (shown once — store it in a password manager)
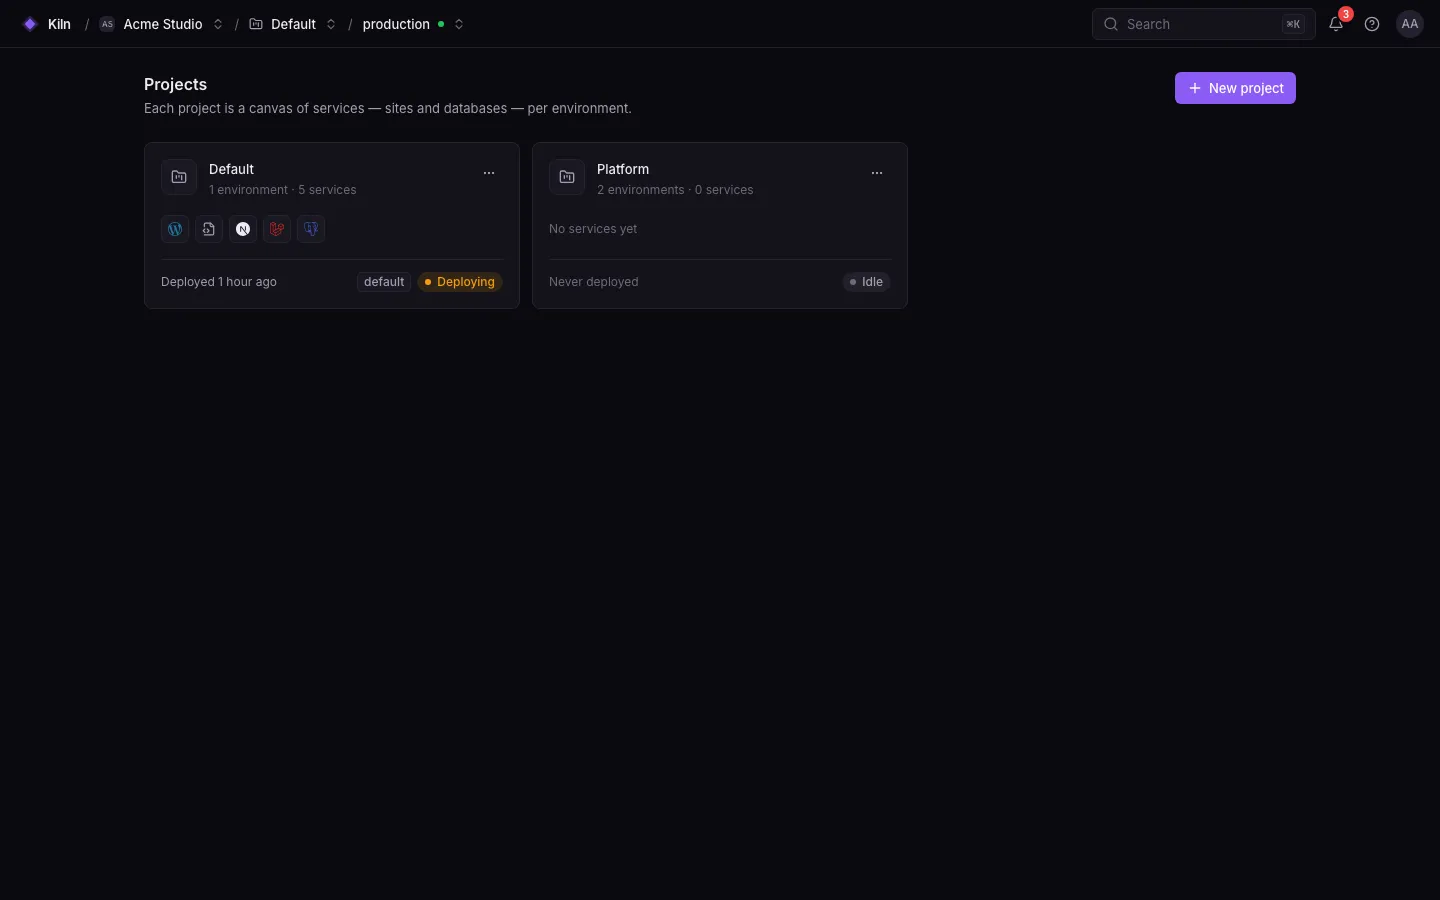
Next: falak-ctl status | falak-ctl doctor | falak-ctl backupOpen https://falak.example.com and log in. You land on the Projects dashboard with a Default project.
3. Connect your app server
Section titled “3. Connect your app server”-
Open Servers → Create (or press ⌘K and type “server”).
-
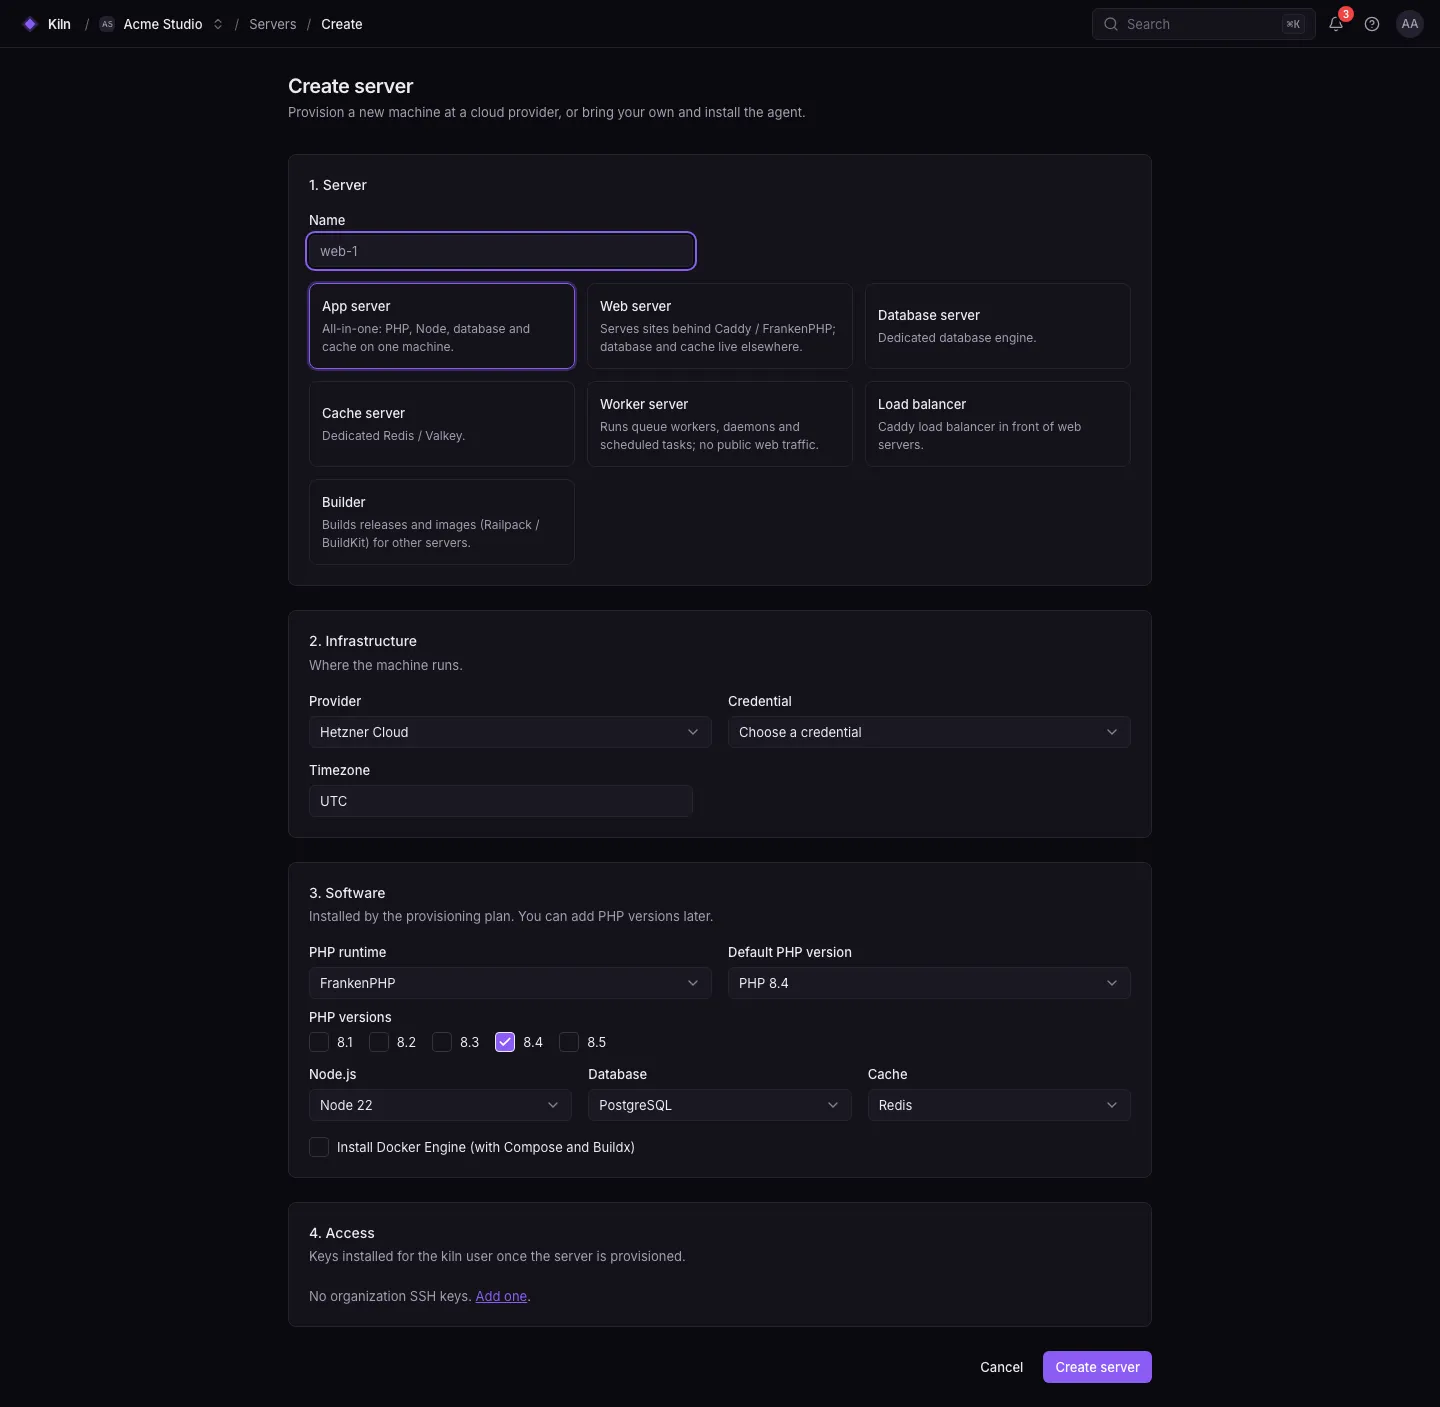
Fill in the form:
- Name:
app-1 - Type: App server (PHP, Node, database and cache on one machine)
- Provider: Custom (bring your own server)
- Software: keep the defaults (FrankenPHP, PHP 8.4, Node 22). Add a database if your app needs one.
- Name:
-
Click Create server. Falak shows a one-line install command:
Install command (example) curl -fsSL https://falak.example.com/install/Xy3…a9 | sudo sh -
SSH into the app server as root (or a sudo user) and run that command.
Expected output falak: downloading falak-agent (amd64)falak: enrolling with https://falak.example.comfalak: falak-agent installed and running -
Back in the UI, the server moves from Creating to Provisioning to Active. Provisioning installs FrankenPHP, PHP, Node.js, the firewall and SSH hardening. It takes a few minutes; you can watch the output on the server page.
The install token is single-use and expires after 24 hours. If it expires, regenerate the command on the server page.
4. Connect GitHub
Section titled “4. Connect GitHub”-
Open Settings → Source control and click Connect GitHub.
-
Confirm the GitHub App on github.com. Falak registers a private app for your organization with read-only access to repository contents and metadata, plus
pushevents. -
On the installation page, pick the repositories Falak may deploy. GitHub sends you back to Falak.
Prefer a personal access token, or use GitLab or Bitbucket? See Connect with a token.
5. Deploy your app
Section titled “5. Deploy your app”-
Open the
Defaultproject. You see the canvas for theproductionenvironment. -
Click + Create and choose Git repository.
-
Pick the GitHub connection, your repository and the branch. Falak detects the framework and suggests a preset (for example Laravel or Next.js).
-
Select the server
app-1. Keep the domain choice Generate (a freesslip.ioname with a Let’s Encrypt certificate). -
Click Deploy. The new service appears on the canvas, and its panel opens on the Deployments tab with the first deployment streaming.
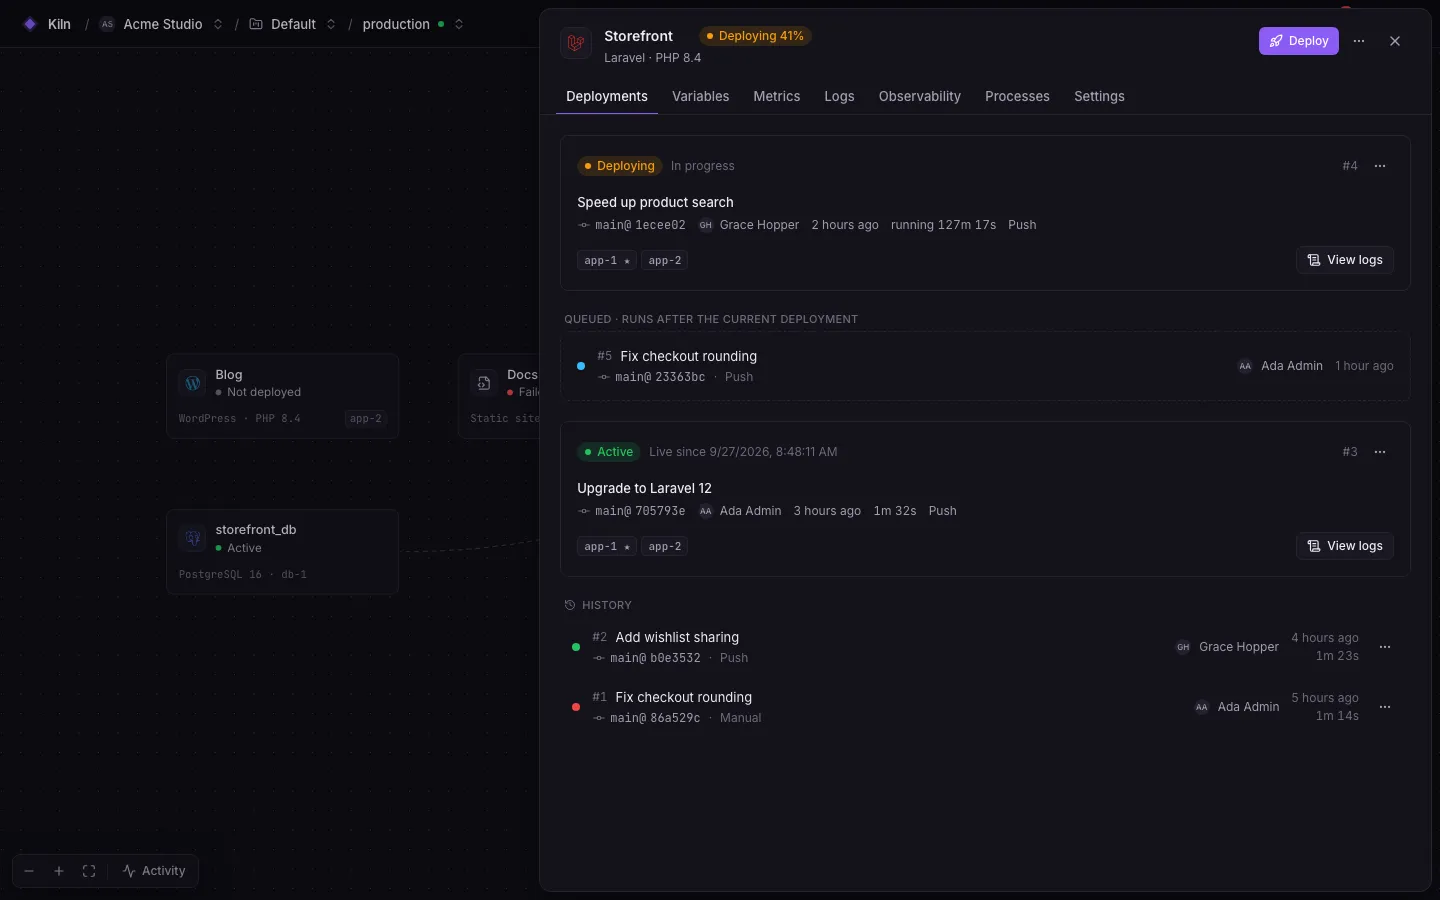
A deployment runs these phases: Build → Fetch → Prepare → Migrate → Activate → Restart → Health. When the health check passes, the service shows Active and its domain, for example https://shop.203-0-113-20.sslip.io. Open it.
6. Push to deploy
Section titled “6. Push to deploy”Push-to-deploy is on for sites created from a connected repository. Push a commit to the branch:
git commit --allow-empty -m "Trigger a Falak deploy" && git pushA new deployment starts within seconds. The old release keeps serving until the new one is healthy.
7. Control Falak from your terminal
Section titled “7. Control Falak from your terminal”Install the falak CLI on your computer and log in with a token from Settings → API tokens:
curl -fsSL https://falak.sh/install-cli.sh | FALAK_URL=https://falak.example.com shfalak deploy shop --waitfalak logs shop --followSee Install and log in for options.
If something goes wrong
Section titled “If something goes wrong”| Symptom | Fix |
|---|---|
Installer stops with DNS does not point at this host |
Create the printed records, wait for propagation, run the installer again. It is safe to re-run. |
| The install command fails to enroll | The server must reach both https://falak.example.com and https://agents.falak.example.com. Run falak-ctl doctor on the control plane host. |
| The deployment fails in Health | Open View logs. The health check requests /up for Laravel and / for Node apps by default; change the path under Settings → Deploy. |
| The build stays queued | Run falak-ctl logs builder on the control plane host. |
More in Troubleshooting.